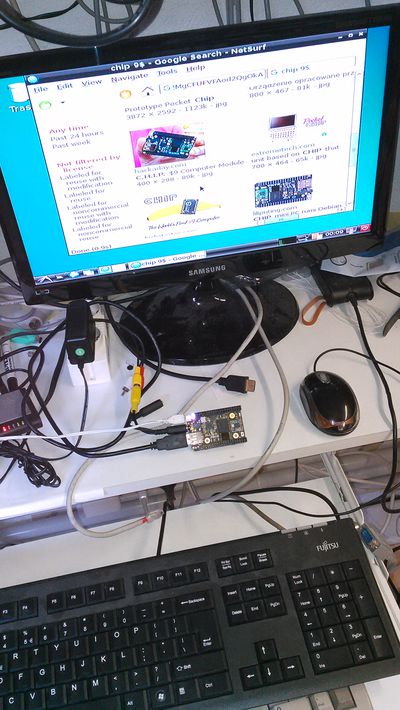
Chip9$ now it's a good Debian GUI
Dear reader. This was my first experiment with NTC's Debian image on Chip9$. The following link points to the updated version of this posting: Chip9$ now it's a better Debian GUI
Chip 9$ runs jessie Debian and Xorg server (I am running lxde in the picture here below).
(There are still details to fix, but it works!)
Chronicle of Debian installation
first step: flash the debian image
I have used on my laptop (Debian SID) the procedure described here for Ubuntu. I am not using any vagrant/virtualbox virtual machine as I don't want any proprietary virtualbox extension running on my laptop
I had a problem during the flashing phase so I am describing it here to help whoever could step on the same issue (I skipped the step about sunxi-tools as I already had a version of fel).
I got this on the terminal where I ran ./chip-update-firmware.sh -d
== upload the SPL to SRAM and execute it ==
waiting for fel...OK
== upload spl ==
== upload u-boot ==
== upload u-boot script ==
== upload ubi ==
Invalid command --progress
== execute the main u-boot binary ==
== write ubi ==
flashing.......................................................................................................TIMEOUT
ERROR: could not flash
The problem was --progess! If you use standard fel (got from https://github.com/linux-sunxi/sunxi-tools) it does not support --progress, so to solve the problem either get the git from http://github.com/NextThingCo/sunxi-tools as explained in the instructions or delete the --progress option in chip-fel-flash.sh line 146.
second step: connect chip to a network
Unfortunaly wireless-tools packet is missing in the image, so iwconfig does not exist. please people@NTC add wireless-tools in the standard image
I downloaded the .deb files (of wireless-tools and the dependant library libiw30) from here:
https://packages.debian.org/jessie/armhf/wireless-tools/download
https://packages.debian.org/jessie/armhf/libiw30/download
and then I put them on a usb key.
From chip:
# mount /dev/sda1 /mnt
# dpkg -i /mnt/libiw30_30~pre9-8_armhf.deb
# dpkg -i /mnt/wireless-tools_30~pre9-8_armhf.deb
# umount /mnt
For the experiments I use my laptop in hostap mode no encryption. On it the IP address is 192.168.42.254/24 and I have set up forwarding/masquerading.
On chip my setup has been:
# ip addr add 192.168.42.1/24 dev wlan0
# iwconfig wlan0 essid myessid
# ip route add default via 192.168.42.254
Now it is possible to set up the essid of the wifi net and connect. BTW: /etc/resolv.conf was missing.
# echo nameserver 8.8.8.8 > /etc/resolv.conf
third step: install some packets
I like aptitude
# apt-get update
# apt-get install aptitude
IMHO a *nix host must have building tools.
# aptitude install vim build-essential python python3
Without this you'll get a lot of warnings... locales is missing (this should be a good idea to be part of the standard image)
# aptitude install locales
# dpkg-reconfigure locales
Now for the GUI, X first:
# aptitude install xserver-xorg-core xserver-xorg-input-all xserver-xcore-video-all xinit
And a (possibly light) graphical environment:
# aptitude install lxde netsurf
this is just a starting point
much more to do.
X is currently using the frame buffer, it should fully use the support of the embedded video card. The resolution is quite low.
I still have a problem on ssl-certificates. It seems the authentication with most of the ssl-CA is not working properly.
I'd like to update the kernel from chip itself. Maybe there is a standard way but I have not discovered it, yet.
